It wasn’t Valentine’s Day when Tita prepared a mole (“mow-lay”) with chocolate, almonds, and sesame seeds in Laura Esquivel’s novel Like Water for Chocolate. It was a mole that, if Cupid were God, would have been for her to eat alone with Pedro, the man she loved. Instead, the mole was for a banquet honoring the firstborn child of Pedro and his wife Rosaura, Tita’s sister.
“The secret is to make it with love,” Tita tells a guest who wants her recipe. And she means it. As Tita grinds the almonds and sesame seeds together, Pedro walks into the kitchen and is transfixed by the sight of Tita’s body ungulating as she works the stone with energy and grace. They share a passionate gaze and can no longer hide their love.
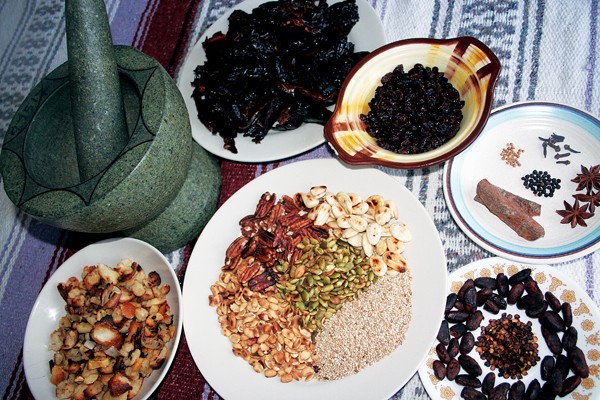
The word mole comes from molli, an Aztec word that translates into sauce, mixture, or concoction. There are as many ways to make mole as there are kitchens in Mexico, but essentially it’s a ground paste of roasted chile peppers, nuts, seeds, fruit, and spices.
 Ari LeVaux
Ingredients for mole
Mole is a celebratory dish served at the best of occasions, where it often headlines the meal. The idea of chocolate in a main course might seem odd, but historically, chocolate was served bitter and spicy, like the Aztec brew Cortez drank from a golden cup. Sweet chocolate as we know it comes from Europe, while modern mole, in its myriad forms, incorporates many ingredients the Europeans brought to the New World.
I’m going to share a mole recipe that was inspired by Tita’s, though I’ve tweaked it for V-Day by increasing the chocolate, and served the mole with chicken instead of the walnut-fattened turkeys Tita used. This mole is spectacular with wild game birds as well.
Remove the skin from a chicken and simmer it with a carrot, an onion, and two stalks of celery, all whole. When the chicken is falling-apart soft (1-2 hours), remove from heat and let cool. Pull out the bones and stuff.
Meanwhile, heat a heavy pan on medium. Toast, and then set aside the following:
¼ cup pumpkin seeds, toasted until they start to pop; ¼ cup almonds; ¼ cup pecans; ¼ cup sesame seeds; ¼ cup cocoa seeds or nibs; and ¼ cup peanuts, all toasted until brown.
(If you want to follow Tita’s recipe more closely, omit the pecans, pumpkin seeds, and raisins, below.)
Remove the stems and seeds of 3 dried pasilla chiles, 3 dried anchos, and a mulato (or substitute with poblano or guajillo). Break the chile skins into pieces, and then toast in the pan until crispy, but not burnt. Set aside.
Toast the chile seeds until dark brown, set aside.
Add 1 tablespoon of oil to the pan, and fry a half-cup of raisins, stirring often, until they puff up.
Add more oil, sauté 5 cloves of garlic and a medium onion. Tear apart a bread roll, toast the chunks, and fry the chunks for 10 minutes with the garlic and onions.
With a mortar and pestle or spice grinder, grind 2 inches of cinnamon stick, 1 teaspoon each of black peppercorns and coriander, ½ teaspoon of anise seeds, and 5 whole cloves.
Put the roasted nuts and seeds in a food processor, run it until they’re pulverized, and begin adding the shards of chile. If at any point the food processor’s contents get too thick, add broth from the chicken pot. Add 3 tablespoons chocolate (double that if you couldn’t find cocoa seeds or nibs to roast).
Add the fried onion garlic bread, and one-half of the ground spices. Keep adding just enough chicken broth so it all keeps getting sucked through the blades.
Tease apart the chicken flesh and reheat it in enough stock to cover it.
Scoop a cup of your mole paste into the cooking chicken and mix everything really well. After it’s simmered together for 10 minutes, taste it. Add more ground spice from the mortar and pestle if you want. Add sugar, one teaspoon at a time, stirring, mixing, and tasting, until it just starts to taste sweet. Mole, like love, is bittersweet, and its flavor depends on this delicate balance.
Salt to taste. Cook another half-hour, until it starts to thicken.
Chicken mole is often served with rice or tortillas. I prefer to tear a few corn tortillas into pieces and add them to the mole 5 minutes before it’s done cooking, and then serve it in a bowl, garnished with chopped onions. A glass of red wine makes a great accompaniment. The wine’s acidic earthiness enhances the flavors of the mole.
Or, you can skip the chicken, use water or stock to facilitate the food processor stage, and serve the mole any number of ways — including straight, with a spoon, or combined with equal parts mayo to make molennaise, a great spread, dip, or edible body paint.
Tita’s mole did not create the passion that she and Pedro shared but allowed it to surface. And so, too, will your interpretation whet the appetite of any passions, if indeed they exist, between you and your Valentine. Hopefully, this love will be less star-crossed than Pedro’s and Tita’s.
 Ari LeVaux
 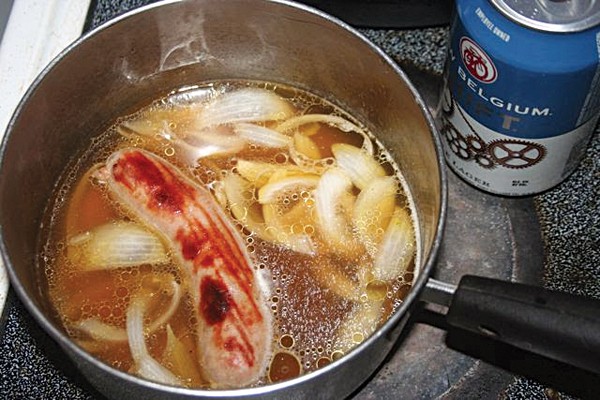 Ari Leveaux
 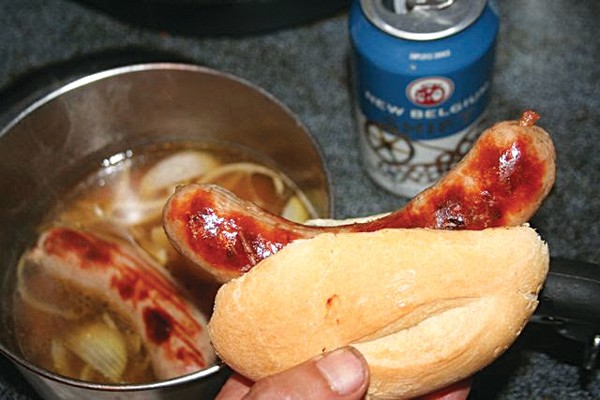 Ari Leveaux