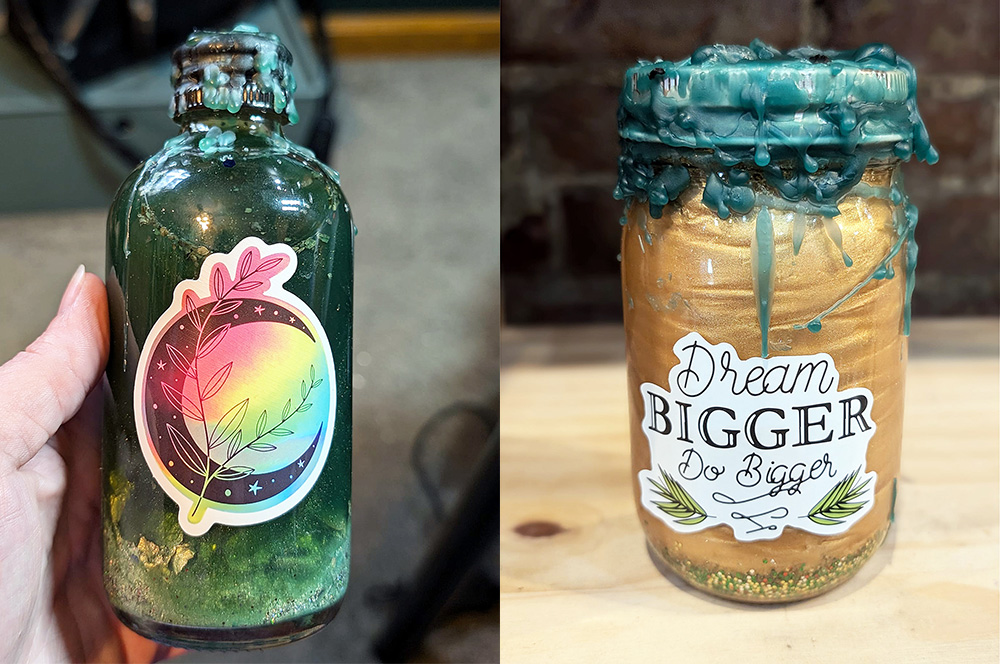
October is here and that means we’re all on the hunt for everything witchy. A relatively easy thing you can do this season is create a witch bottle. Typically witch bottles are spells or tools used in manifestation work. But if you are looking for a cute, decorative item to add to your Halloween décor, you can make a witch bottle for decoration.
Making a decorative witch bottle can be a fun activity for the whole family and a great way to express your creativity. You’ll need jars. Any size will work so long as the mouth is big enough to add things into the bottle and it has a lid to seal it. You’ll also want glitter, mica powder, dyes, foil paper, or other pretty items to add to your jar. Once you have all your supplies, let your creativity flow. Add any glitter, mica powder, dye, or foil into your bottle. Fill with water and put the lid on the jar. If you’d like to make it extra witchy, you can melt wax over the top or add a label to the bottle. It can be easy to make your own labels to tie to the jar, but you can also purchase some witchy stickers while you’re collecting supplies to go in the bottle. I made a few of these up for a party I threw years ago and they stayed up in my house for years.
Making an intentional witchy bottle is not much different, but it will depend on what you want to manifest. In order for your bottle to be effective, you have to begin with a very clear goal. The ingredients and tools you should use change based on what type of love you’re looking to invite into your life. Do you want to find long-lasting, romantic love? Are you hoping to strengthen familial bonds and connections? Visualize a very clear image of what this spell jar’s success looks like to guide and inform the whole creation process.
Once your intent is set, it’s time to select a jar and begin deciding which ingredients, tools, and other implements you may want to include. I encourage you to put a good amount of thought into this and be thorough. Make sure you have everything you need when beginning, to avoid breaking your concentration to fetch something in the middle of it. This would be disruptive and could affect the spell’s viability. Spend some time researching herbs, oils, and symbols associated with your desires.
Most spell-crafters agree that it’s important to energetically and spiritually cleanse the immediate space where you’ll be working. This ensures that no unwanted energies will interfere with or muddle your spell. Try out different methods, or combinations of methods, to figure out which ones feel best to you. You don’t have to stick to any one method, either. Feel free to change it up depending on your mood or the intent of the witch bottle. Four different methods you can use to spiritually prepare your ritual space are sound cleansing, smoke cleansing, cleansing with visualization, and space cleansing with crystals.
Now it’s time to build your jar. I often start by adding written intentions to witch bottles because that helps to set the intention for the rest of the bottle’s creation. There are no hard-and-fast rules to the assembly, so please feel free to assemble yours in the ways that feel most appropriate to you.
There are a few different ways to seal your finished witch bottle. Wax sealing, sealing with tape, cloth sealing, and using sigils to seal the spell jar spiritually are the most commonly used methods. After your spell jar has been assembled, it’s time to give it a concentrated boost of magickal energy to activate it and set its power into action. There are several ways of doing this: through visualization; by using athames, wands, or clear quartz points; or by shaking the jar. Shaking the jar is one of my favorite ways to activate a witch bottle, especially those that are water-based.
Whatever you decide to do, enjoy the witchiness of October — and happy manifesting!
Emily Guenther is a co-owner of The Broom Closet metaphysical shop. She is a Memphis native, professional tarot reader, ordained Pagan clergy, and dog mom.
